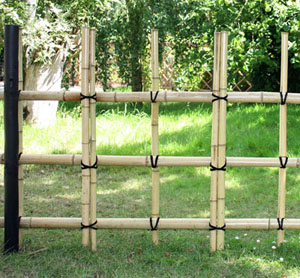
The final task was to cut and tie the tateko in position.
As previously described, the tateko were cut at a joint at the top end and exactly 1 metre in length, using the measuring stick. The thickest ones were then selected as the single poles for the front, with each of the rear pairs comprising a medium and a thinner pole.

Each intersection of dōbuchi and tateko then had to be tied with soaked shuro-nawa twine using an ibo-musubi knot, which was a lengthy and fiddly task (the photo right shows the knots from the rear). The best way of learning the knot is probably to find a video on the Internet of someone actually doing it - although these all tend to be in Japanese!
But the overall result was very much worth it, as seen left. For anyone following the tea house build, note that a dummy window with bamboo grille and false studwork have now been added to make the front look more natural.
Return to start of yotsume-gaki or go back to Fences and gates.